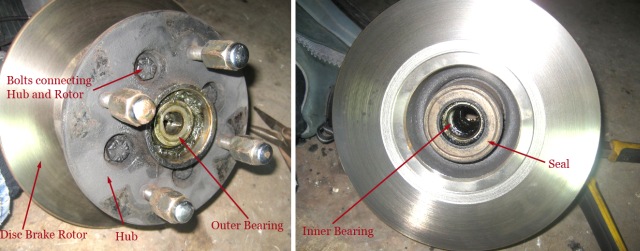

If you decide you want to remove your bearings .. you can do it with the hub and rotor connected or you can seperate them. I seperated them because it made it easier to clean everything up.
Here is where I got a little lazy and didn't take pictures of their removal .. but I will describe the process. The outer bearing will usually fall out or easily pull out with your fingers. If not .. the process for that bearing is the same as for the inner.
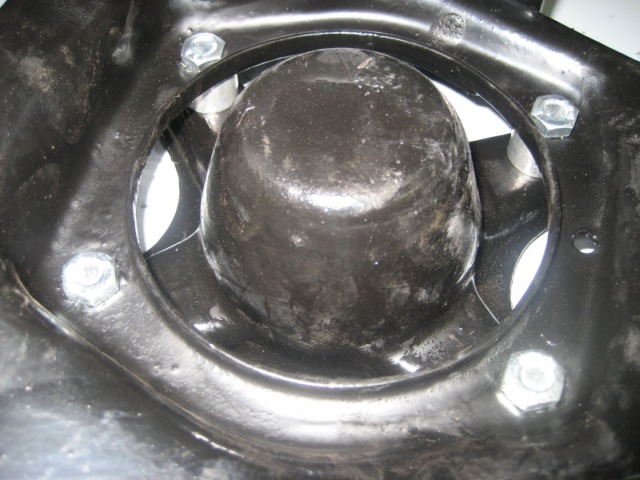
If you look IN the hub .. you will see a bearing on this/your side .. followed by a spacer/sleeve that is like 1 1/2" wide .. followed by the bearing on the other side. I worded it this way because it doesn't matter which end you look in. Anyways .. at the far end of the sleeve you will see two slots across from each other .. these slots give you access to the inner edge of the far bearing. Just take a punch or screwdriver and sit it on that edge and tap the bearing out .. alternating between the two slots effectively wiggling the bearing out .. its easier than you think.
If you are doing the inner bearing .. the seal will pop out with the bearing. And take note that the bearing will probably come apart. Don't sweat it .. just save the pieces and put it back together .. it will be obvious how to do this.

It wasn't obvious to me how the bearings went in .. so .. here is the scoop. If you look at the outer rim/race of the bearing .. you will see that one side is a lot thicker than the other. The thicker side always faces the INSIDE of the hub.
Many of the high tech guys put in tappered bearings or special order bearings from England. The one needs modifications and the other is pretty salty .. so I just decided to go with the standard replacement bearing offered by the many online suppliers. I feel confident they will last the life of the car.
To reinstall .. I just found a big socket and tapped them in. They go in pretty easy. I actually did this while the hub and rotor were apart. But I wanted you to have a mental picture of the process so this is somewhat of a reinactment ... grin.
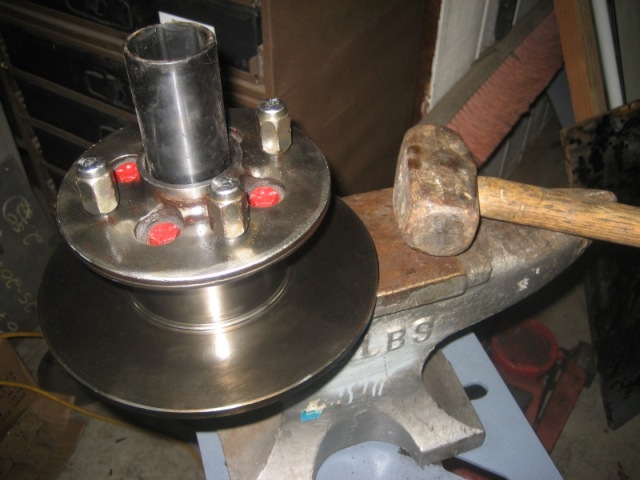
Well .. here it is .. all prettied up and ready to install. I didn't cover the actual bushing replacement because you just push them in .. no mystery. I went with red poly .. and like the look and I really like the way the car feels
Putting everything back is pretty easy. After reinstalling the inner fulcrum pins .. I just set the spring in there .. lifted it up with my hand enough to get the jack under it .. and up it went
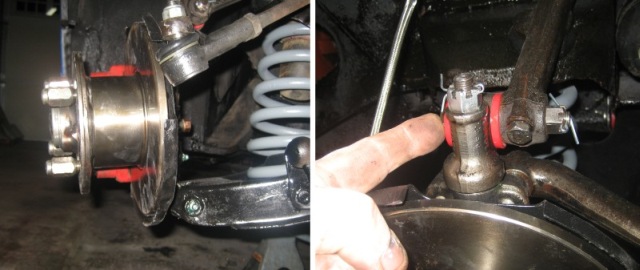
You may have noticed that the trunnion fulcrum pin has a relief cut into it. It has to be inserted first and properly for the locking pin to go in. I used a marker on the head to give me an idea of where the grove was. I still had to work it back and forth.
As your getting it together ... If ... you notice that your hub/rotor is angled way in at the bottom .. then you made the same mistake I did. Note in the second picture how the fulcrum pin (and red bushing) are on the inside (towards the car) of the kingpin .. Thats Wrong ! .. it should be on this side of the kingpin .. the outside. I didn't discover this until I tried to put my wheels on .. and they kept falling off of the studs ... lol.
Here is something you may want to think about. This is a real easy way to lower the front of your car just a hair. Most of the British car part suppliers offer this "slight" lowering kit. As you can see .. all it amounts too is a small 1/2" spacer that goes over the bolt between the spring seat and the lower link. I'm not sure I would pay the 20 some bucks for it again .. It would be so easy to make. Anyways .. the amount it lowers the car is actually noticable .. ( and cool )
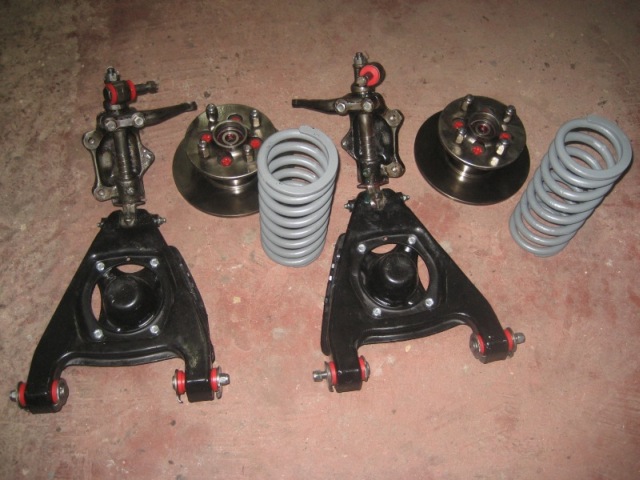
I didn't have a large budget so I tried to replace only the parts that needed replacing. That ended up being :
both tie rod ends ... the rubbers were pretty bad and they were cheap
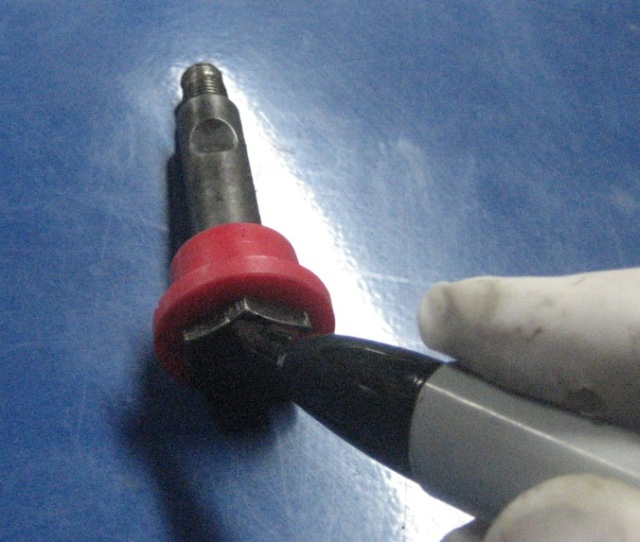
both outer fulcrum pins .. the big threaded bolts the kingpin swivels on
obviously all the bushings ..
two wheel bearings .. one that was broke the other was questionable
both cotter pins that lock in the outer fulcrum pins
Note .. I didn't list incidentals like paint and washers and cotter pins etc.
Anyways ... thats about it. I 'm hoping this might give someone else the confidence to do their own car. Good Luck.
If you have any questions you can email me through the link below

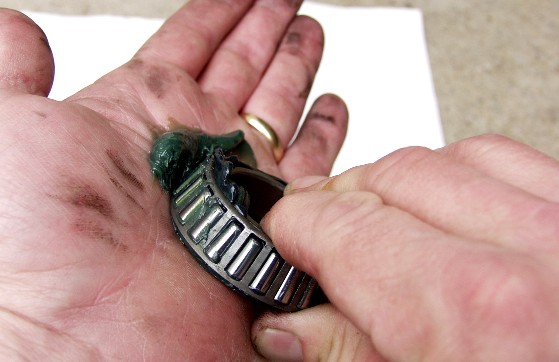
Note ... this is NOT the bearing I used . This is a tapered bearing... I used OEM style ball bearings. I used this pic to show how to pack a bearing .
Before putting the bearings back in you should repack them. Just go to the auto parts store and get a can of bearing grease. Then put a big glob in the palm of your hand. Take the bearing and goosh an edge into the grease .. rotating the bearing as you go. Btw .. that isn't my hand. I borrowed this image from the web.